Like many IT professionals exploring new technology, I am trying it out on a personal project before using it in production. I have heard about the CI/CD tools like Jenkins, Travis, Bamboo, but never had the chance to use them.
So I decided to start a blog about my DevOps journey, beginning with building a Jenkins server and using it build my code then deploy it to AWS as the web host.
Jenkins is the focus of this post, so I will not dwell on the other coponents of this deployment, but in short they are:
- CentOS 7.4
- Jekyll 3.7 (and associated Ruby dependencies)
- Amazon Web Services (Route 53 and S3)
Step 1: Installing Jenkins
Starting will a minimal install of CentOS, first install Java and wget
sudo yum install java-1.8.0 wgetAdd the Jenkins repo and import the keyfile
sudo wget -O /etc/yum.repos.d/jenkins.repo http://pkg.jenkins-ci.org/redhat/jenkins.repo
sudo rpm --import https://jenkins-ci.org/redhat/jenkins-ci.org.key
Install, enable and start Jenkins
sudo yum install -y jenkins
sudo systemctl enable jenkins
sudo systemctl start jenkins
Open the port Jenkins uses on the firewall
sudo firewall-cmd --zone=public --add-port=8080/tcp
sudo firewall-cmd --reload
Step 2: Configuring Jenkins
Login to the Jenkins interface running on the server just installed using port 8080
http://<your-ip-address>:8080The initial admin password is set automatically during installation and can be found in the Jenkins user home directory
sudo cat /var/lib/jenkins/secrets/initialAdminPasswordFollow the first use wizard, installing the suggested plugins and creating an admin user when prompted You can now login to Jenkins to really get started!
First we need to install a plugin so Jenkins can upload the site to AWS S3.
- In the Jenkins menu choose Manage Jenkins and then select Manage Plugins.
- Click on the Available tab then search for “S3”.
- Select the S3 publisher plugin then click the Download now and install after restart button.
- It will now start installing, Check the box labelled Restart Jenkins when installation is complete and no jobs are running.
- Jenkins will restart and the plugin can now be used.
Next configure Jenkins to use an AWS account with access to the S3 bucket.
- In the Jenkins menu choose Manage Jenkins and then select Configure System.
- Scroll down to the section Amazon S3 profiles.
- Add a profile, specifing the Access key and Secret key for the AWS account with access to the S3 bucket.
Step 3: Create the Jenkins pipeline
- Click New Item enter a name for the project, select Freestyle project and click the OK button
- Scroll down to Build, click the Add build step button and choose Execute shell
- In the Command box, enter the build script to run:
~/.rvm/gems/ruby-2.4.1/wrappers/jekyll build --source ~/pixyll/
- Scroll down to Post-build Actions, click the _Add post-build action button and choose Publish artifacts to S3 Bucket.
- Enter the Source for the files to upload
_site/**/*
- Enter the Destination bucket
pmcwhite.co.uk
- Select the correct AWS region for the S3 bucket and check the No upload on build failure option.
- Click the Save button.
Step 4: Run the Build
Click on the Build now icon and the build will run. It will compiles the Jekyll code, then uploads the resulting website to AWS, which you are viewing now :)
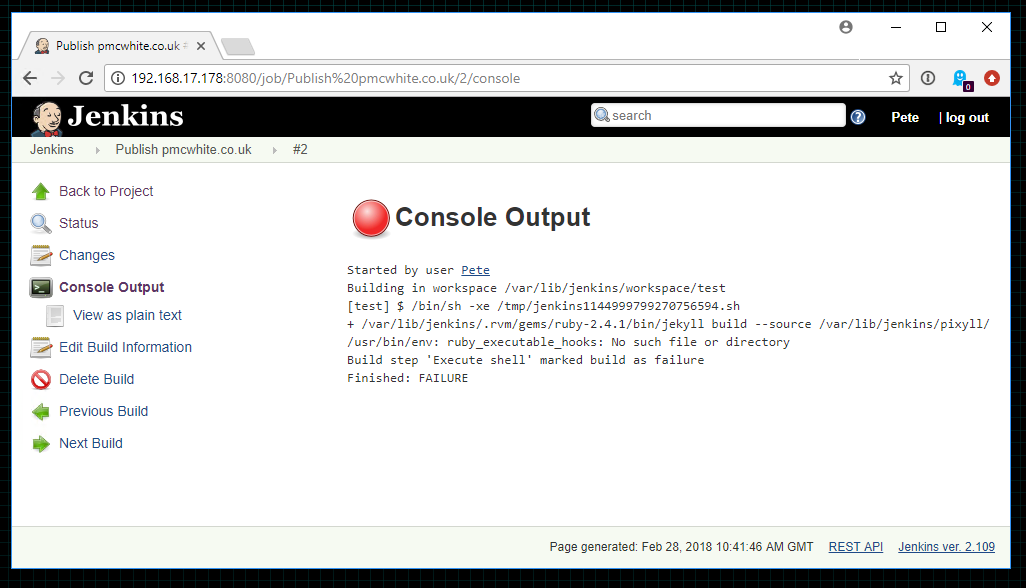
From the Jenkins project page, you can chose a build from the Build History and then click on Console Output to see the results of the run. This is especially useful if the build failed.
 In this example the build failed due to an error with the build script (Due to the way RVM works you need to specify the whole path the script, but for reasons that escape me, “bin” on the real path needs to be replaced with “wrapper”.)